Our Location
304 North Cardinal St.
Dorchester Center, MA 02124

304 North Cardinal St.
Dorchester Center, MA 02124
Books have the power to transport us to new worlds, ignite our imagination, and leave a lasting impact on our lives. As an avid reader and lover of the written word, I’ve always been fascinated by the process of creating books. In this blog post, we’ll unravel the basics of book making, exploring the art and craftsmanship that go into transforming words into tangible works of art.
Every book begins with a spark of inspiration, an idea that takes shape through the art of writing. Whether it’s a novel, a non-fiction work, or a children’s story, the process of writing lays the foundation for the book-making journey. Authors pour their hearts and souls into crafting captivating narratives, using language to captivate and engage readers.
Once the initial draft is complete, the editing process begins. Editors meticulously review the manuscript, offering feedback on structure, grammar, clarity, and overall coherence. This collaborative process between author and editor ensures that the book’s message is conveyed effectively and resonates with readers.
Book design and layout play a crucial role in capturing readers’ attention and enhancing their reading experience. Graphic designers collaborate with authors and publishers to create visually appealing covers, select appropriate fonts, and arrange text and illustrations in an aesthetically pleasing manner. This careful attention to design elevates the book from a mere collection of words to a visual masterpiece.
Printing and binding breathe life into the words, transforming them into tangible books. Printing technology has evolved significantly, offering a wide range of options for book production. From offset printing to digital printing, each method has its own advantages and considerations, such as cost, quantity, and customization.
Once printed, the pages are carefully bound together using various techniques, such as perfect binding, saddle stitching, or case binding, depending on the desired look and durability. Binding not only holds the book together but also contributes to its overall aesthetic appeal.
Once the books are ready, they are distributed to bookstores, libraries, and online platforms, connecting them with eager readers. This crucial step ensures that the stories within the books reach their intended audience, fostering a connection between authors and readers around the world.
The first step in creating a unique book is deciding on the type that best suits your content and creative vision. Here are a few popular book types to consider:
Choosing the right book type allows you to tailor your content and presentation to the specific needs and expectations of your readers.
Book design is an art form that blends aesthetics and functionality, capturing readers’ attention and enhancing their reading experience. Here are key elements to consider when designing your book:
Remember, book design is an opportunity to visually express your story’s essence and leave a lasting impact on readers.
Personalization allows you to infuse your unique voice and style into every aspect of your book. Here are a few ways to personalize your literary masterpiece:
Personalization adds an extra layer of authenticity and allows readers to connect with you on a deeper level.
Before we dive into the process, let’s gather the essential materials:
Accordion books are versatile and visually captivating. Create an accordion-style structure by folding a long strip of paper back and forth, resembling the bellows of an accordion. Use each panel to showcase illustrations, photographs, or written content, allowing readers to unfold a world of stories with every extension.
Craft a travel journal that becomes a treasured keepsake of your adventures. Incorporate pockets for storing mementos like postcards, tickets, or dried flowers. Use decorative papers, maps, or even fabric covers to reflect the spirit of each destination. Fill the pages with handwritten entries, sketches, and photographs, immersing yourself in the magic of reliving your travel experiences.
Infuse your handmade books with the beauty of nature. Collect fallen leaves, pressed flowers, or small twigs to incorporate into the covers or as embellishments within the pages. Use eco-friendly materials like recycled paper or handmade paper embedded with natural elements for a truly organic feel. Let nature be your guide as you create books that pay homage to the wonders of the great outdoors.
Combine various artistic techniques to create mixed media collage books. Incorporate elements such as acrylic or watercolor paintings, collaged images, found objects, and handwritten or printed text. Let your imagination run wild as you layer textures, colors, and patterns to construct visually stunning and thought-provoking pages that tell a unique story.
Craft miniature books using creative folding techniques. Experiment with origami-inspired folds or accordion folds to create compact yet captivating books that fit in the palm of your hand. These miniature wonders can be used as personalized gifts, tiny art portfolios, or even storytelling tools with concise narratives.
Explore the art of quilling to add intricate details and dimension to your handmade books. Use thin strips of colorful paper, curled and shaped into delicate designs, to embellish the covers or create captivating illustrations within the pages. Quilled books are a testament to the patience and skill of the creator, offering a visual feast for the eyes.
Before touching your handmade book, ensure your hands are clean and free of oils, lotions, or residue that could transfer onto the pages. Clean hands help prevent stains and minimize the risk of damage to the delicate materials and surfaces.
To protect your handmade book from environmental factors, store it in a controlled environment. Aim for a space with stable temperature and humidity levels, avoiding areas prone to extreme fluctuations. Excessive heat, humidity, and direct sunlight can cause paper to warp, fade, or deteriorate over time.
Moisture is the nemesis of paper, leading to mold, mildew, and deterioration. Keep your handmade book away from areas with high humidity, such as basements, bathrooms, or kitchens. If your book does come into contact with moisture, gently blot the affected area with absorbent paper and allow it to air dry completely before closing or storing.
When opening or closing your handmade book, handle it with utmost care to prevent tears, creases, or damage to the binding. Support the pages and covers while turning them, avoiding excessive force or bending. By treating your book gently, you can preserve its structural integrity and prevent unnecessary wear and tear.
When adding additional elements to your handmade book, such as adhesive, embellishments, or inserts, ensure they are acid-free. Acidic materials can accelerate the degradation of paper over time. Opt for acid-free adhesives, archival-quality papers, and acid-free inserts to protect the longevity of your book.
Consider using book covers or protective sleeves to shield your handmade book from dust, dirt, and external elements. Book covers can also provide an additional layer of support and protection for the covers and spine, preventing wear and tear.
Periodically inspect your handmade book for any signs of damage, such as loose pages, weak binding, or insect infestations. Promptly address any issues to prevent further deterioration. If necessary, consult a professional book conservator for guidance on repairs or restoration.
Expand your repertoire of book structures to add variety and interest to your creations. Experiment with unique styles such as:
By exploring different book structures, you’ll discover new possibilities for presenting your content and expressing your artistic vision.
Elevate your book making skills by incorporating mixed media elements. Experiment with:
Integrating mixed media elements into your book making projects allows for unique and visually captivating creations.
Expand your creative horizons by incorporating alternative materials into your book making. Consider:
Embracing alternative materials adds depth, texture, and a touch of innovation to your book making endeavors.
Enhance your book making skills by participating in workshops or classes led by experienced artists and instructors. These immersive learning experiences provide hands-on guidance, opportunities for collaboration, and exposure to new techniques and ideas. Whether online or in-person, workshops offer invaluable knowledge and inspiration to fuel your book making journey.
Connect with fellow book makers through local communities, online forums, or social media platforms. Engage in discussions, share your work, and exchange ideas and feedback. Collaborating with others in the book making community fosters growth, expands your perspective, and opens doors to new creative possibilities.
To start with bookbinding, gather the basic tools and materials you’ll need. This includes sheets of paper for the inside pages, a piece of cardboard for the front cover, a hole punch or a drill to create sewing holes, and a glue stick or other adhesive. An easy and fun beginner project is to learn how to make a simple book. There are many online tutorials, both video and written, that can guide you step by step through the process of making books.
Common bookbinding methods include saddle stitching, perfect binding, Japanese bookbinding, and coptic binding. Each method requires different tools and techniques, but all involve folding sheets of paper, creating a stack of pages, and then using some form of adhesive or thread to bind the stack together.
To prepare the cardboard for a book cover, cut out two sheets of cardboard that are the same size as your desired book cover. Apply the glue on one side of the cardboard pieces, and then glue the cardboard onto a larger piece of wrapping paper or other decorative paper face-down. Make sure to leave a gap in the cardboard where the hinge of the book will be, to allow the book to open easily.
You can use a regular hole punch, a heavy-duty punch, or even a drill with a small bit to create holes in a stack of pages for binding. If using a drill, make sure to have a block of wood or another scrap material underneath to protect your table.
To ensure that the book stays flat after applying glue, place one or several heavy books on top of it until the glue dries. This helps to counteract the moisture in the glue, which can cause the paper to curl.
To make a fun photo album, start by cutting watercolor paper (or another type of thick paper that’s suitable for photos) to your desired size. Bind the sheets of paper using your preferred bookbinding method, such as Japanese bookbinding. For the cover, cut out a piece of cardboard that is the same height as the book and twice the width, plus a little extra for the spine. Decorate the cover with wrapping paper or paint, then glue it to the first and last pages of your album. This makes the book fun, personal, and perfect for displaying cherished memories.
A punching cradle is a special tool used in bookbinding to hold the stack of pages steady while you punch the sewing holes. It is designed to let you punch straight and evenly spaced holes using a hole punch or an awl, which is essential for the actual binding process.
To create a book that is 6 inches wide and 9 ½ inches tall, start with large sheets of paper that are at least 12 inches wide and 9 ½ inches tall. Cut the large sheets in half so that each piece is 6 inches by 9 ½ inches. These will be the individual pages of your book.
To create a simple book with minimal tools, you will need sheets of paper, scissors, and a glue stick or tape. Fold the sheets of paper in half, cut along the fold if necessary, and stack them to form a booklet. For the cover, cut out a larger piece of paper or cardboard, and decorate it as desired. Use the glue stick to attach the inside pages to the cover, making sure you cover the entire left edge of the inside pages with glue.
To create a marbled effect on the front cover of a handmade book, you will need a marbling kit or acrylic paints, a shallow tray, and a piece of paper or cardboard that will be the cover. Prepare the marbling bath according to the kit’s instructions, or mix acrylic paints with water and a marbling medium. Gently lay the paper or cardboard onto the surface of the marbling bath, then lift it off and let it dry. Once dry, this marbled paper can be glued onto your piece of cardboard to create a stunning and unique front cover for your handmade book.
In book arts, some common binding methods include saddle stitching, perfect binding, coptic binding, and Japanese stab binding. Each method offers a different aesthetic and level of durability, allowing artists to choose the best technique for their project.
To make handmade books, start by choosing paper for the inside covers and sheets of paper for the pages. Cut and fold these papers to the desired size, and then use a binding method of your choice to bind the book. Be sure to have a sturdy adhesive like a glue stick or PVA glue to apply glue to the paper securely.
To bind a large book, choose a heavy-duty binding method, such as case binding or coptic binding. These methods are robust and suitable for a book that is tall, wide, or has a large number of pages. You will likely need strong adhesive, heavy paper or cardboard for the cover, and possibly a book press or heavy weights to ensure everything dries flat and secure.
To create a fun book for kids, start by choosing colorful and engaging paper for the inside covers and pages. Cut out the paper to the size you want the book to be (e.g., book is 6 inches wide and 7 ½ inches tall). Let children draw or write on the pages, and then bind the book using a simple binding method like saddle stitching. This can involve folding the pages in half, drawing two vertical lines where you want the staples to go, and then punching two holes along these lines for the staples.
To ensure the top of the book is aligned and smooth, use a ruler or a straight edge to draw a second line across the top of the book block where you want the edge to be. Trim along this line with a guillotine or a pair of scissors to remove the rough edges, creating a clean, straight top.
An old phone book can be a great material for book arts. You might use the pages as a base for a new type of book, where you draw, paint, or collage over the text. Alternatively, you can cut the phone book into a sculpture, use its pages to practice new binding methods, or simply as a resource for paper in your other projects.
Please don’t rush while using sharp tools like knives or scissors in bookbinding. Always cut away from yourself, keep your fingers clear of the cutting path, and use a cutting mat or a safe surface. Make sure your tools are sharp and in good condition, as dull tools can slip and are more dangerous.
When cutting paper for the inside covers, draw a ¾ inch border around the edge of the paper you drew in the previous step. Then cut along the lines carefully, making sure to keep the cuts straight and even. This border will give you space to apply glue without making a mess and will ensure the inside covers are sized appropriately.
To punch holes in the spine of a bookbinding project, you will need a ruler, a pencil for marking where the holes will go, and a hole punch or an awl. If the paper is thick, you might also need a hammer and a heavy-duty hole punch.
Yes, there are many video tutorials available online that provide step-by-step instructions for various book arts projects and binding methods. Websites like YouTube have a plethora of tutorials, from beginner to advanced levels, that cover all aspects of bookbinding, from choosing materials and tools to the actual binding process. Simply search for “bookbinding tutorial” or “book arts tutorial” to find a wide selection of videos. Some might also like to check bookbinding courses on platforms like Udemy or Skillshare, which often include video lessons along with materials lists, beschreibung (descriptions), and kommentare (comments) from other learners.
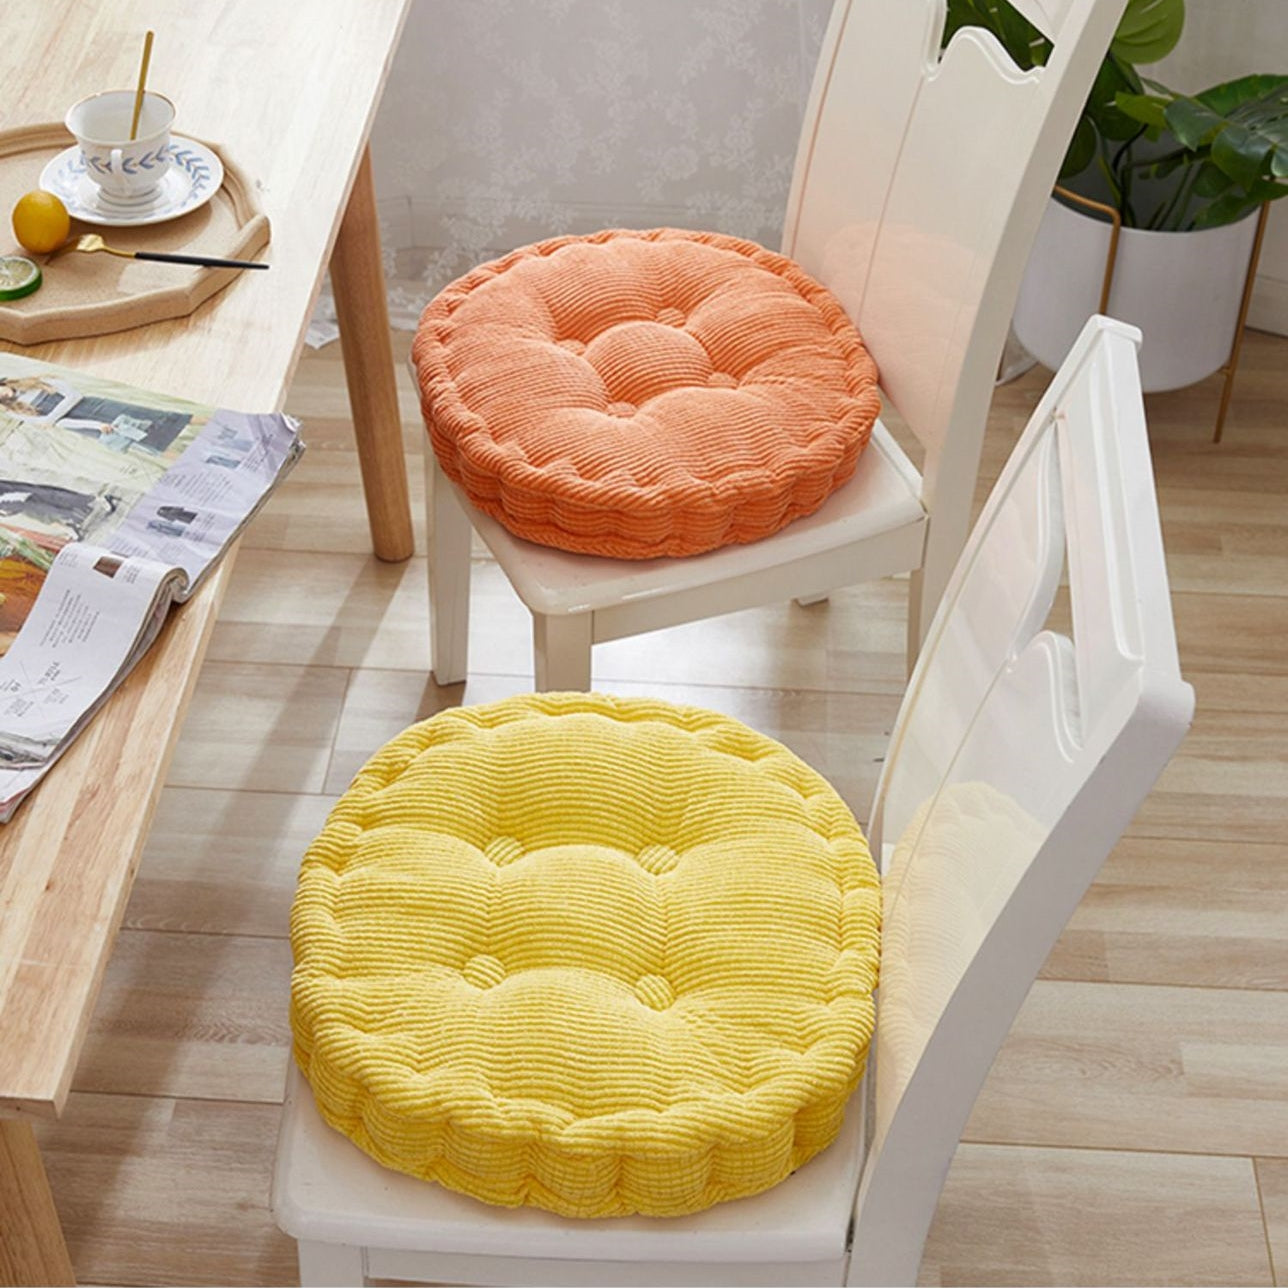
Are you tired of uncomfortable and stiff seating options? Look no further than the Corn Fleece Tatami Cushion, the perfect […]
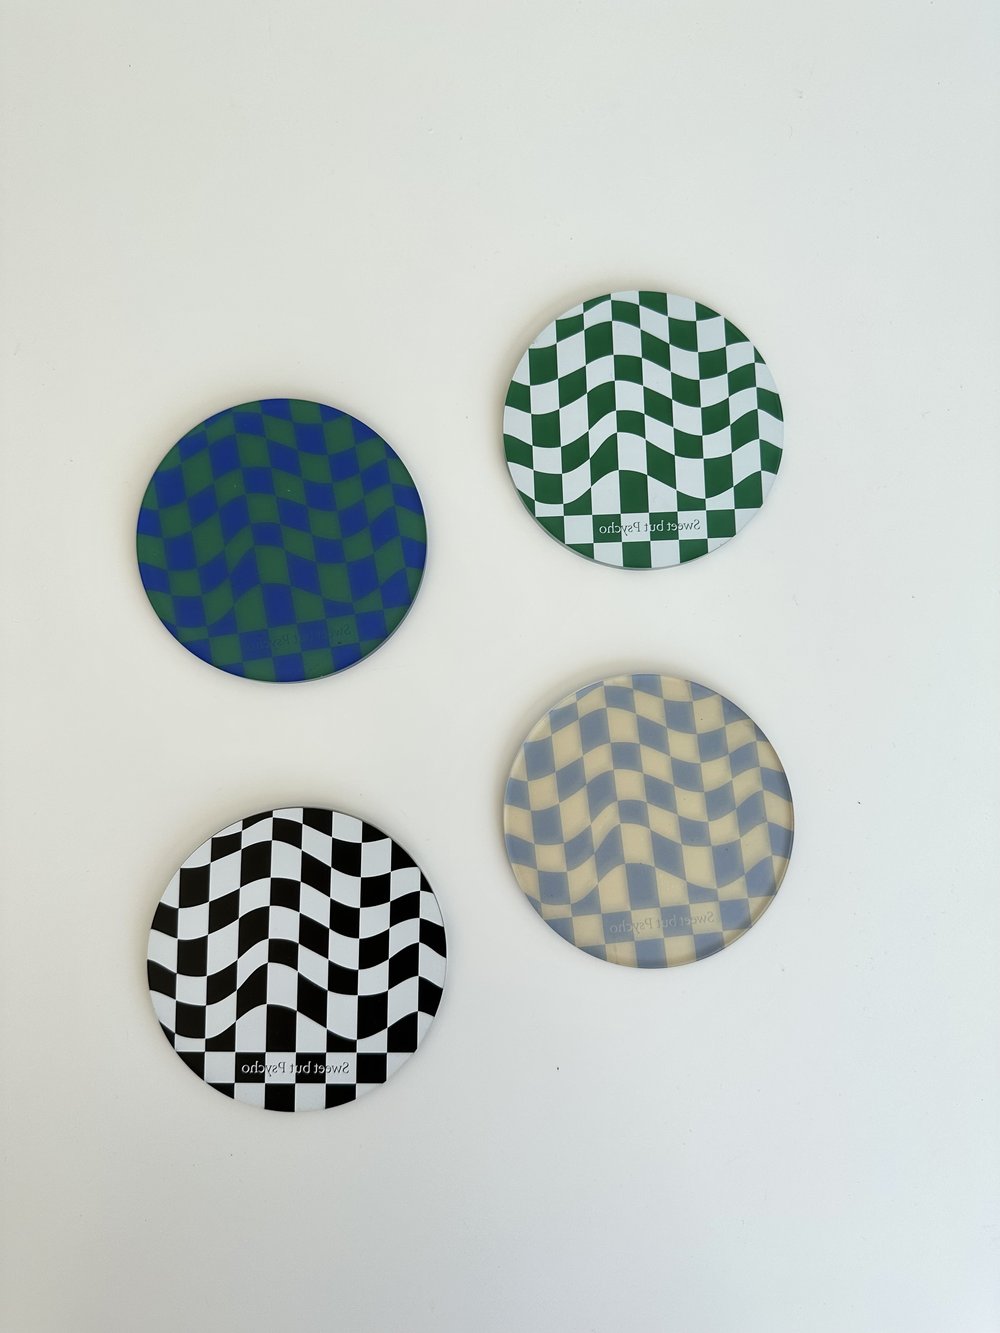
Introducing our new collection of stylish checkered acrylic coasters, designed to add a touch of elegance and sophistication to your […]
Are you expecting a little bundle of joy soon? Creating a special and memorable nursery for your baby is undoubtedly […]
The Elodie Wrap Detachable Skirt offers an effortless way to elevate your wardrobe with its unique design and adaptability. This […]